How To Make Your Instagram Shoppable
Learn how to set up shoppable posts on Instagram to boost your eCommerce brand’s reach, drive conversions, and capture sales.

Shoppable Instagram content might be an untapped revenue source for your eCommerce brand.
Back in 2020, Instagram replaced the user “Activity” tab with the “Shop” tab. Now, Instagram Shopping allows eCommerce businesses to set up a storefront on the social media platform and sell their wares to followers and potential customers all over the world.
See, when your brand’s set up for Instagram Shopping, you’ll “tag” your products in the photos, videos, and other content you share. These Shoppable Posts feature a shopping bag icon in the bottom left corner to let users know they can snag the items they like.
Once users click that tag, they can read product descriptions and purchase your items directly in-app or complete the transaction on your eCommerce site.
Pretty genius, right?
We’ll be exploring how to set up your brand on Instagram Shopping in today’s guide.
Why Every eCommerce Brand Should Sell On Instagram
Instagram selling is so effective because it is streamlined for your customers. Shoppers go through the entire buyer’s journey -- from discovering your brand with a simple hashtag to making a purchase -- without leaving the app.

According to the company, nearly half of people surveyed use Instagram to shop weekly. And research from HootSuite and Facebook shows [*][*]:
- Instagram is the 7th most visited website in the world.
- 1.22 billion people use Instagram each month.
- 59% of US adults use Instagram daily; 38% of those daily visitors log on multiple times per day.
- 1 in 2 people have used Instagram to discover new brands.
- More than 130 million users tap on an Instagram Shopping post every month.
- 54% of people have purchased items/services in the moment or shortly after seeing them on Instagram.
Instagram is one of the best channels to reach new leads, engage current customers, and leverage your existing product photos and user-generated content to score even more revenue. It also helps drive traffic to your website. Ecommerce merchants who generate shoppable Instagrams capitalize on this data to increase their own revenue.
Instagram Shopping Terms You Should Know
According to Instagram, you’ll want to have these official terms under your belt to use Shoppable posts like a pro:
The Instagram Shop Tab on the homescreen lets users discover new brands to follow, products to scope out, editors’ picks, and more -- all personalized for them.
Your Shop is your brand’s customizable storefront on Instagram. You can think of it like your website’s home page. Users will browse your shoppable items, explore your collections, and purchase right from your Instagram profile.
Product Tags let users shop for your products in your Posts or Stories. You can highlight items from your product catalog directly in your images and videos with a tag. All users have to do is tap on the tag to click through and learn more.

Ads with Product Tags increase the reach of your posts. You can set up Ads with Product Tags in your Ads Manager.
Product Detail Pages (PDP) give browsers all the relevant information about your products, such as pricing, materials, etc. This info comes from the item descriptions in your product catalog. Your PDP also pulls in product-tagged content from all over Instagram.
Collections allow you to curate products by themes, such as new arrivals, seasonal goodies, or sale items.
Psst! Learn about the benefits of content curation here.
Checkout On Instagram is a dream come true for marketers and eCommerce business owners. It helps you speed up the checkout process by allowing users to purchase directly from Instagram. Users no longer have to leave your PDPs on the app, head to your website, and go through the checkout process to give you the sale.
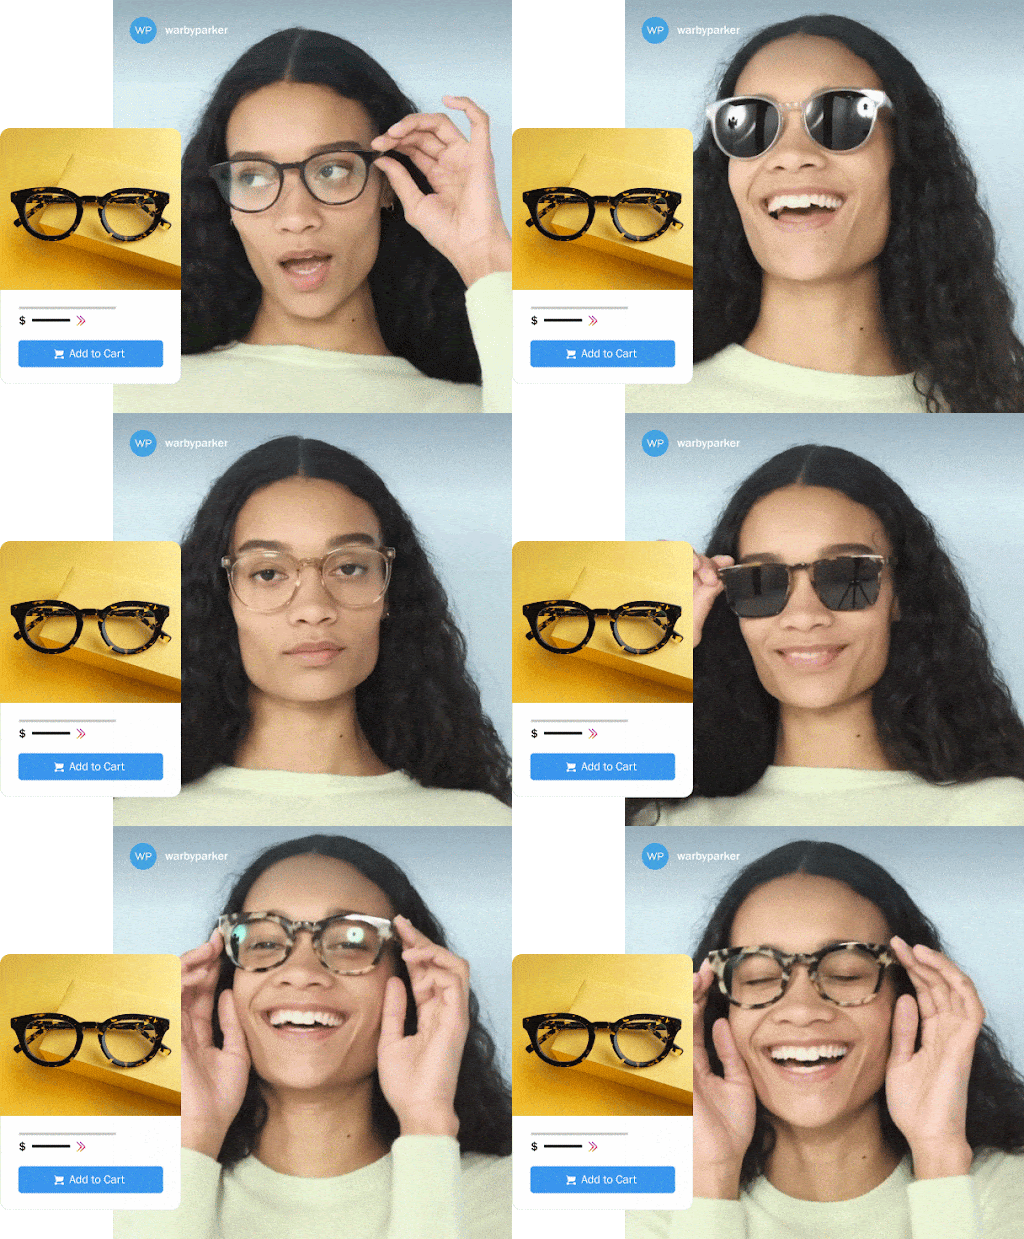
Note: This feature is currently only available to eligible US business and creator accounts. If your business doesn’t have access to Checkout On Instagram, users will be directed to your eCommerce website’s checkout page.
Product Launches. Businesses opted into the Checkout On Instagram feature can use Product Launches to announce new drops, exclusive flash sales, and other anticipated events. Your followers will preview all the details and set reminders to buy ASAP. Note: This feature is currently only available to eligible US businesses.
You can refer to this list as we walk through the setup process next.
How To Make Your Instagram Shoppable In 4 Easy Steps
Your eCommerce brand can start creating shoppable Instagram posts in just a few days. Use these four steps as a checklist for success:
1. Make Sure You Meet the Eligibility Requirements
Instagram outlines all the eligibility requirements your brand needs to meet before being allowed to sell on their site. You’ll need to:
- Check to see if your store is located in a supported market. Your Instagram account must be in an available market to tag products.
- Meet the Commerce Eligibility Requirements. These ensure your brand sells eligible physical products and complies with Instagram’s (Facebook’s) policies, like their merchant agreement, terms of use, and community guidelines.
- Prove your business has its own verified website domain. Your eCommerce website must contain product listings available for direct purchase from your business’ store.
- Create an Instagram profile from a Business or Creator account. Set up a Business Manager account for your brand and connect it to your Facebook Business Page. A Business Manager account lets you manage your ad account, gives you access to the Commerce Manager (where you’ll set up your shop), and provides vital analytics.
- Set up your shop in Commerce Manager. Login to Commerce Manager and click Get Started to Create Your Shop. Click Checkout on Facebook or Instagram to decide your customers’ checkout methods, then click Get Started again. Choose to set up a shop on Instagram (or Facebook, or both).
Once you check off all those boxes, you’ll be ready to upload your shoppable products.
2. Pick a Tool To Upload Your Product Catalog
A product catalog is a file containing all the products your brand sells, plus their product descriptions and pricing information. There are a few ways to upload your product catalog to Instagram. These are the two most popular:
Manually input products through Facebook Business Catalog Manager. You’ll select your eCommerce products and ensure the product descriptions match your current prices. You’ll need to keep your catalog updated yourself, especially when running sales and promotions.

Your other option is to:
Import your product database from a supported eCommerce platform (such as Shopify, BigCommerce, etc.). This option is the easiest if you’re already hosting products on a partner platform with Facebook integration. Plus, managing your products on your partner platform automatically syncs your updates with Facebook, so you don’t have to worry about this.
Since there are more than a handful of supported eCommerce platforms, click this Facebook guide on How To Import Items to Your Facebook Catalog From a Partner Platform and follow the specific instructions for yours.
3. Submit Your Account for Approval
When your product catalog’s integrated with your Instagram account, it’s time to submit your brand for review and approval.
Head over to your brand’s Instagram profile settings. Click Sign Up for Instagram Shopping. Then just follow the process to submit your account for review.
Instagram will need to review and verify that your company’s Facebook page, product catalog, and website match up and meet eligibility requirements. So the approval process might take a few days.
You can check the status of your application by visiting the Shopping area in your settings.
4. Turn On Instagram Shopping (woo!)
Congratulations on getting your account approved! Now go to your Instagram profile settings, hit Business, then tap Shopping to turn on Instagram Shopping. Just select the product catalog you want to connect, tap Done, and high five!

To activate the Shop page on your Instagram profile, you need to add at least nine shoppable posts. Then visitors can see all your shoppable posts under one tab for easy peasy shopping bliss and new product discovery.
How to Use Instagram Shopping As An eCommerce Brand: Best Practices & Tips
There are tons of ways your eCommerce brand can optimize the features found in Instagram Shopping. Here are a few best practices to experiment with:
Start Tagging Your Content!
Adding tags to your posts separates regular ol’ Instagram content from Shoppable Instagram Content. And the best news? It’s super quick and easy to tag your photos, videos, and other content.
To add tags on Instagram:
- Upload your content (a photo, video, Story, etc.), edit to your brand’s aesthetic, and tap Next.
- Click Tag Products. Then simply tap on the items in your post where you’d like a tag to appear.
- Search for and add the name of the product you want to tag. This must match the name in your product catalog.
- Select your product, and tap Done.
- Share your Shoppable Post!
Kudos! You now have your first Shoppable Post in your brand’s feed (and we know it won’t be the last!). The process is pretty similar for creating:
- A Shoppable Instagram Story (hint: you’ll use the Stickers function to tag your products here).
- Instagram Live Shopping Streams, which allow brands to sell their products during an Instagram Live broadcast.
- Instagram Guides, which are like perfectly curated collections of posts and content. Brands often use them to spotlight gift guides, collaborations, and upcoming trends.
But adding tags isn’t enough to take your Instagram Shoppable Posts to greatness. You also need to:
Optimize Your Tags
Instagram allows you to tag up to five products per single image post, or tag up to 20 products per carousel (or multi-photo) post. The more tags you add, the more items your followers can explore and shop for quickly.
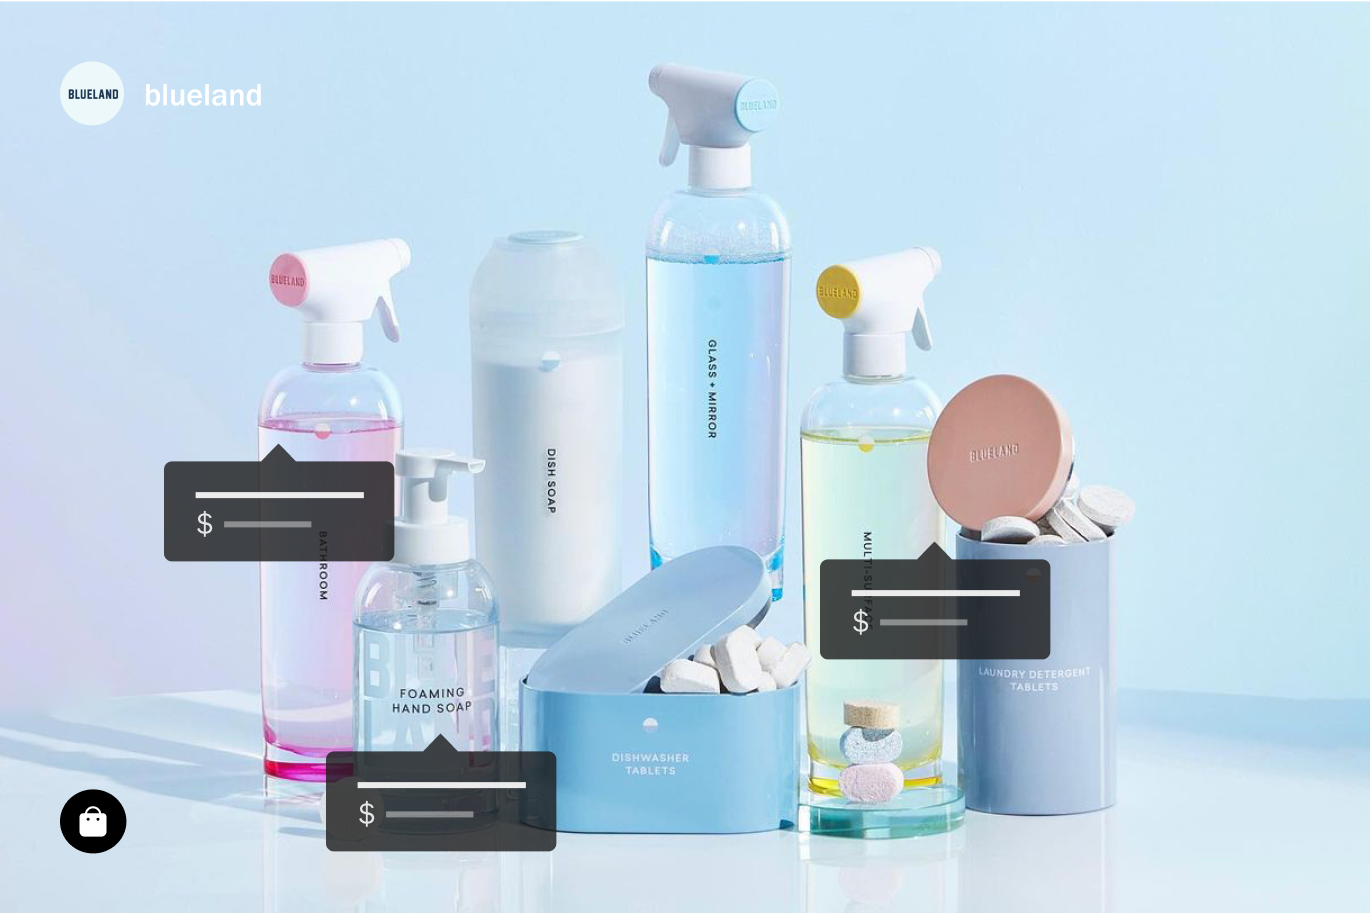
Try to strike the right balance between more than one and one too many tags, depending on how your customers and followers respond best. Experiment to see whether your customers click tags on single-image posts more than carousel posts (or vice versa).
Don’t forget about your older posts. If your brand only recently became Instagram Shoppable, you can bring your older posts up to speed in a jiff. Find the posts with the highest traction (i.e., lots of comments, shares, likes, etc.), and tag the products in them. Every product your account tags will appear in the Shopping tab on your profile, so they’ll snag more eyes on them.
Put Your Customers’ User-Generated Content To Work
User-generated content (UGC) is content that your customers create featuring your products. When customers tag you in their Instagram posts or Stories, you can repost the photo or video and add your shoppable tags to the post.
You can also use your customers’ photo reviews in your Instagram marketing, like we talked about in 6 Reasons Photo Reviews Matter for eCommerce Businesses.
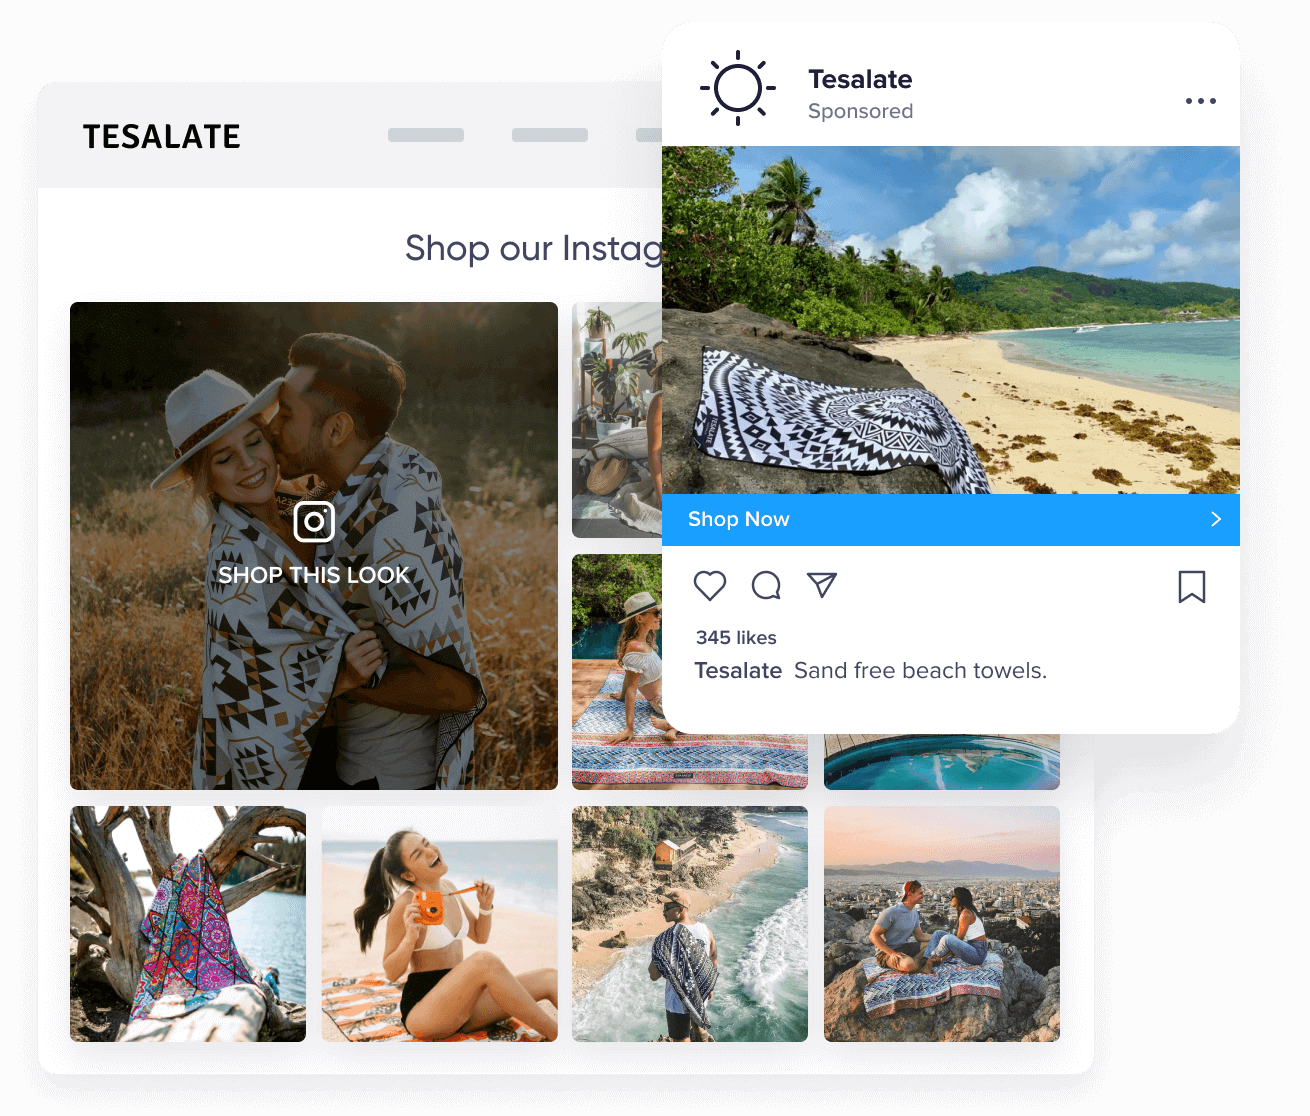
UGC works to influence your customers and motivates them to take action, as we highlighted in our social proof experiments guide. You’ll drive conversions, boost sales, and likely capture loads of new followers (i.e., potential customers).
Is Your eCommerce Business Ready for a UGC Marketing Strategy? Take the Quiz!
Let’s Open Your Instagram Storefront!
Selling your eCommerce brand’s products on Instagram allows your team to reach potential customers in every stage of your buyer’s journey. Your target consumers will have a seamless, trustworthy experience from discovery through checkout -- and it only takes a few steps to bank all this new revenue.
Want to use the power of your customer’s voice to increase social proof and enhance your brand? Leverage our templates and fully customizable display options to beautifully curate and showcase their Instagram photos and videos -- then make them shoppable!
